How to Record Your First Meeting with MateX
If this is your first time using MateX, this guide walks you through the full workflow: create your account, start your first recording, and review the transcript and AI summary after the meeting ends.
Whether your call is on Google Meet, Zoom, or Microsoft Teams, the setup is the same.
What MateX does
MateX helps you:
- Record meetings from one dashboard
- Get high-quality meeting transcription
- Generate AI meeting summaries with action items
- Ask questions with Ask AI using your transcript as context
This tutorial is focused on your first live meeting recording.
Step 1: Create your account or sign in
If you are new, open Sign Up and create an account.
If you already have an account, use Sign In.
After authentication, MateX takes you to the dashboard where you can manage meetings, transcripts, and summaries.
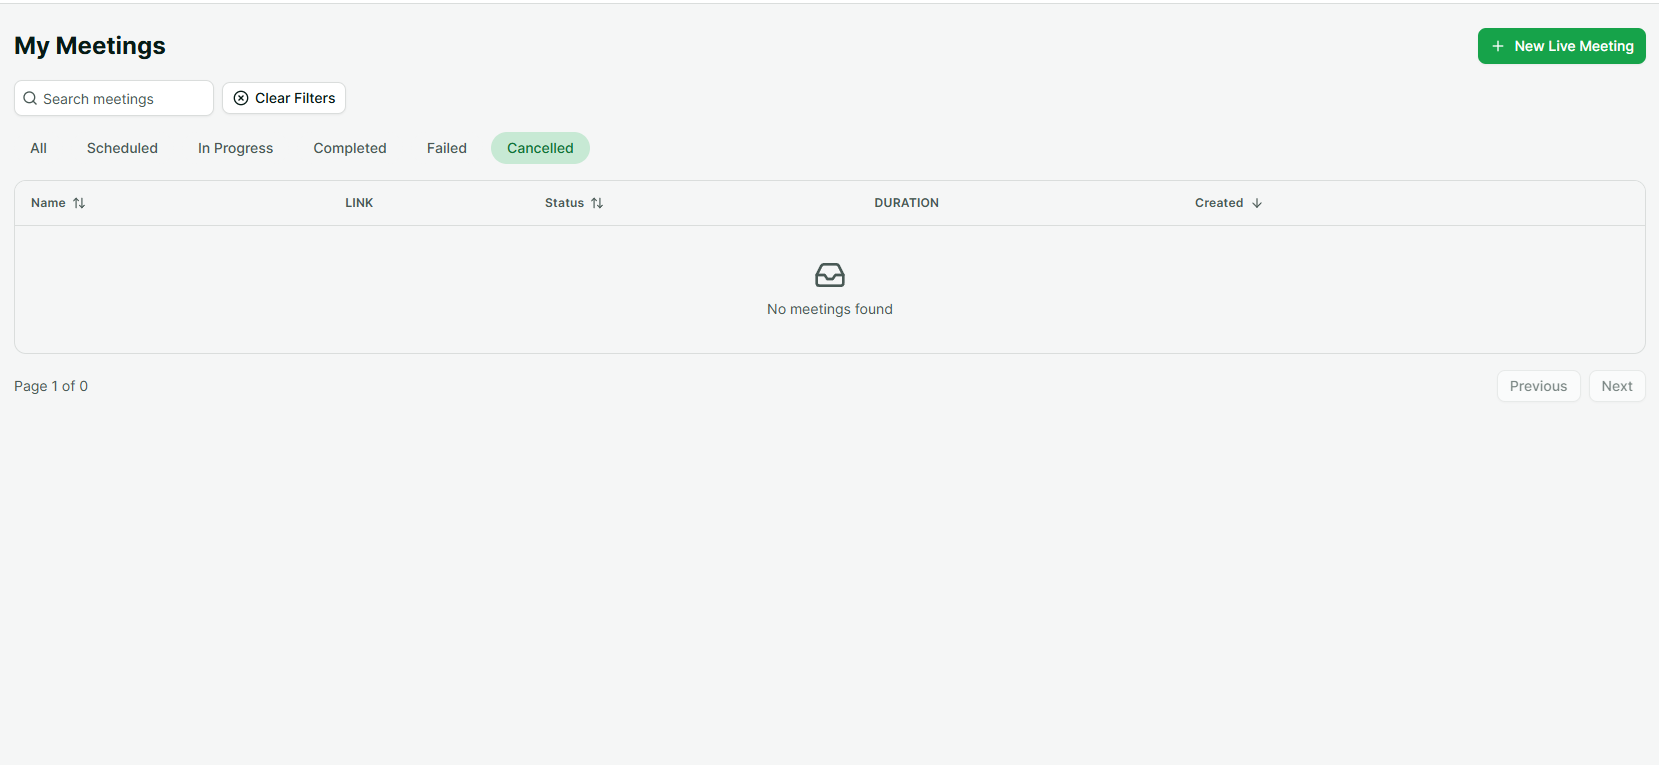
Step 2: Open Dashboard > Meetings
In the dashboard, go to Meetings from the sidebar.
This page is your recording control center. You can:
- Create a new live meeting
- Track statuses like Scheduled, In Progress, and Completed
- Open any meeting to view transcript, summary, and notes
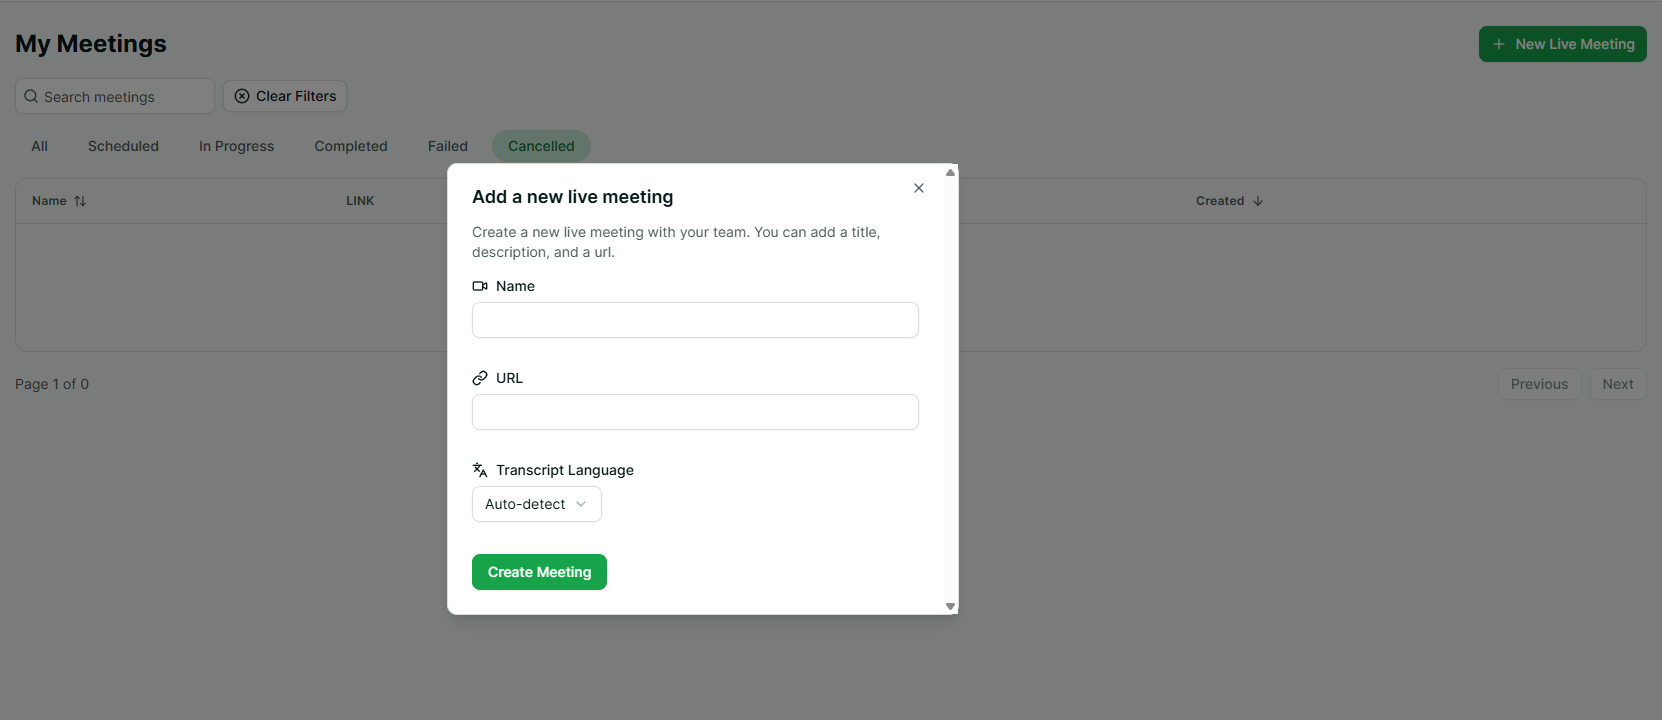
Step 3: Click "New Live Meeting"
Click New Live Meeting in the top-right corner.
A dialog opens with three required fields:
- Name - Your internal meeting title (example: "Weekly Product Sync")
- URL - The meeting link (Meet / Zoom / Teams)
- Transcript Language - Choose the spoken language, or keep Auto-detect
Then click Create Meeting.
Step 4: Let MateX join and record
After creating the meeting, MateX sends a recording bot to your meeting link.
In the meetings table, you will see status updates such as:
- Scheduled
- Joining...
- Waiting Room (if host approval is required)
- Recording
- Completed
Tip: If your Zoom room has a waiting room, admit the bot so recording can begin.
Step 5: Open the meeting detail page
Click the meeting name to open its detail page.
You will get:
- A metadata bar (status, date, language, duration, speakers)
- A transcript panel with search/copy/download tools
- An AI summary section
- Notes and Ask AI options
Important: In the current workflow, transcript and summary are shown after processing is complete.
Step 6: Wait for processing after the call ends
When your meeting ends, MateX processes the recording:
- Builds the transcript from recorded audio
- Generates the AI summary
- Updates status to Completed
Once done, the detail page shows your complete transcript and summary.
Step 7: Use Ask AI for follow-up questions
After the summary is available, click Ask AI to query your meeting.
Useful prompts:
- "What are the action items?"
- "What did we decide about launch date?"
- "Who owns the integration task?"
This turns long calls into searchable, actionable knowledge.
Best practices for better transcript quality
- Use the correct transcript language (or Auto-detect)
- Ensure clear audio (headset/external mic helps a lot)
- Keep one person speaking at a time when possible
- Admit the bot promptly if your platform uses waiting rooms
Final checklist
Before your first recording:
- Account created or signed in
- Meeting link ready (Meet, Zoom, or Teams)
- Language selected
- Meeting created from New Live Meeting
After your first recording:
- Open transcript
- Review AI summary
- Ask follow-up questions with Ask AI
- Save notes for your team
You now have a repeatable workflow to record meetings and turn them into useful outcomes with MateX.
Start now
If you have not tried it yet, create your first recording from your dashboard today and let MateX handle transcription and AI summaries automatically.